Monday, 31 May 2010

Wood, Wood Glorious Wood

So, after a while of doing a lot of grinding, cutting and welding with metal, it was time to break out the screwdriver and the mitre saw and do some woodwork. After a good start through doing boat thursdays work on the galley, which i started on here, and which we continued here, here and here, had ground to a halt, partly because of being busy with work and other jobs, and partly through lack of funds to get the materials. Eventually we managed to buy a whole load of wood

and set to work on the galley.

First up was to finish facing the walls with ply, so we cut the sheets to size

and filled the remaining gaps that we hadn't had the materials to finish off

before filling


and sanding the joins.


Then, with the help of James' Kreg Pocket Hole Jig

I rebuilt the framework for the plan chest shelves, making them stronger and more solidly built than the original temporary ones

and with a split bottom section

to accommodate a fridge for drinks.


I primed the walls and shelf frames

and then turned my attention to the ceiling, which was panelled but in a fairly hap[hazard way, with some of the panels missing and all painted in some kind of super thick, nasty paint that would be a nightmare to get off. We decided that, at least for the next few years, it would be much easier and nicer to just put a nice smooth plywood ceiling over the whole lot.

I cut the shape out of a 3mm ply sheet on the roof,

and then had to cut it in half to get it down the stairs and into the back cabin

before getting one half

and then the other, fixed up

and painted, along with the walls and other woodwork, before putting the shelves into the shelf frames.


Finally, it was time to lay the floor, surely this would be a quick, easy task with such a small space right? I got most of the floor down in about an hour,
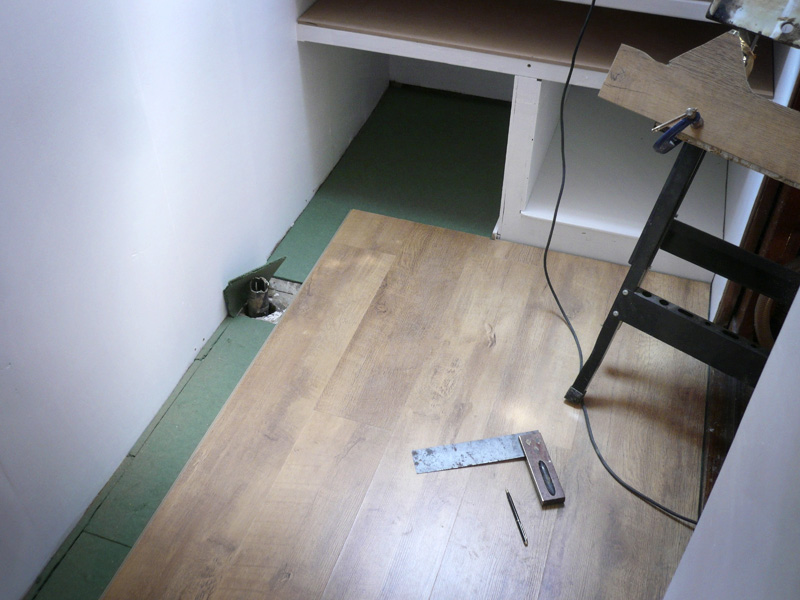
but i knew that eventually i'd have to deal with the Great Lurking Problem, the old sink outlet pipe which was still sticking up through the floor

and which led down to an outlet in the engine room, under the waterline.

The pipe was connected to the valve with an old, slowly perishing rubber joint, and although their was a tap that presumably closed the valve to the outside i didn't fancy trusting it as the only thing between us and water pouring into the engine room if we removed the pipe. We needed to seal off the hole from the outside.

At low tide we went down onto the shore and i ground down the area around the hole

while Lorna set up her welding gear
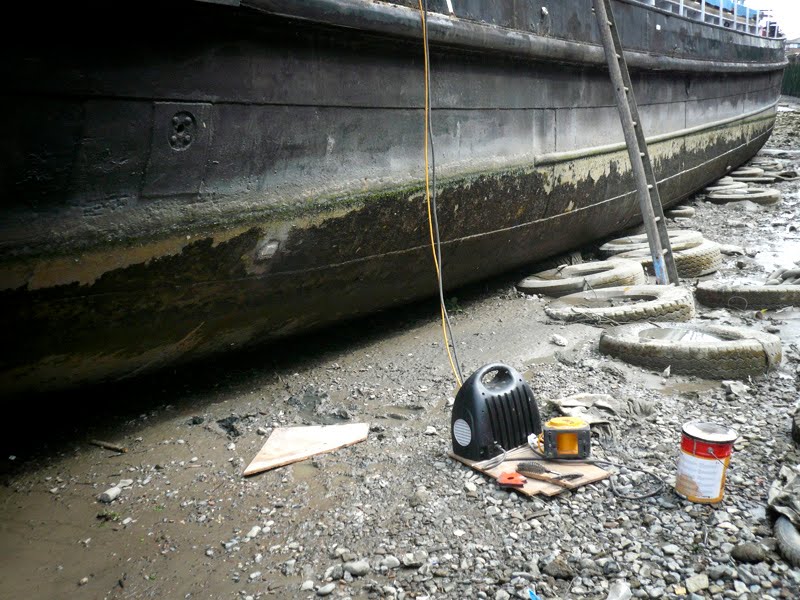
and welded a small plate over the hole.


There was just time to paint over it with a nice thick coat of bitumen and let it dry a little before the tide came in

and finally we could take out the pipe that was sticking up through the galley floor

cover the hole with underlay

and finish the floor.


Bit of a detour just to get a floor down, but another job ticked off the list that was great to finally get around to doing, and a weight off my mind that we're unlikely to have hundreds of gallons of Thames water pouring into the engine room anytime soon!

With the room itself essentially finished it just remained to rebuild the bookshelves that we had temporarily made when we first stripped out the room. We sanded down the scaffolding planks


and screwed everything together to make a bookcase.


All that remained was to fill all the shelves

and, apart from some proper hardwood frames around the windows and skylight, which are definitely a 'second tier' project, the galley was finished!

Sunday, 16 May 2010

A Perfect Circle

After the success of filling the holes in the front deck, we decided to sort out another couple of points of leakiness, resulting from the half built skylight.

The first was the lip of the hole for the skylight itself. Brian had only spot welded it in place, and when we had a downpour it became very clear that the only place that all the water that landed on the front deck wanted to go was down between the lip and the deck and into the bathroom.
So, after practicing on some scrap steel and testing out some newer, thicker, better rods

Lorna welded all around the edge of the lip, sealing it to the deck and making it watertight.


The other gaping hole in the deck was where the extractor fan had been fitted, with a mushroom style vent bolted to the deck itself.

Casting around for a handy piece of steel to use to plug the gap i spotted the legs of the old generator, still welded to the deck, and cut them off

and ground one down 'til it was clean and shiny. Before and after:


I then laid it over the hole, ran down into the bathroom, and sprayed from underneath, giving a stenciled shape of the hole to cut out.


Then, after a lot of cutting and grinding down, i had a circle of metal the right size and shape for the hole, ready for Lorna to weld in.


She welded the piece itself in, and also filled the bolt holes by using left over stubs of welding rod as filler for the holes, and it was all sealed up and watertight.

Sunday, 2 May 2010

fillin' holes

Pretty much the first thing that happened when we bought the boat was that the skipper taking us to our new mooring drove us into a low bridge, ripping the mast out of the deck. Since that slightly terrifying introduction to the world of barge ownership we have never got round to repairing it, partly because it wasn't a very good mast, and was bolted into the 8mm steel plate of the deck, rather than the huge, sturdy, formed-of-40mm-steel-plate, massive pillar clearly designed to be the base of a loading crane/mast. One day we will have a new mast built, and it will be lovely, and the mounting for it will be attached to this pillar, but in the meantime, ever since we've owned the boat there have been 8 little 10mm holes in the front deck where the bolts ripped out. We had plugged them with silicone but over time this had perished and dropped out, and having taken out the ceiling in the bathroom we could see the sunshine through the holes (and occasionally the rain too). It was time to plug the holes properly.

We bought some 10mmm diameter steel bolts

and then when Lorna had set up all her welding gear on the deck

i poked the bolts through from below, and held them in place while she spot welded them (i did this with a piece of wood, i like having skin on my fingers! The wood was smoking impressively while she welded).


She then added more welds to get the bolts securely attached to the deck


before i cut off the bolts as close as possible to the deck and ground them down a little


then we repeated the procedure, welding up any holes that were still there and finally grinding everything smooth

From above it's now a nice, smooth, waterproof, seamless piece of metal

and from below you can see the heads of bolts protruding, shortly to be covered up with insulation. Only took us 2 years!