Monday 22 November 2010

Hatching a Plan II

With cool weather drawing in, and the prospect of lighting the stove getting closer, we took a look at our living room and decided we needed to insulate from the top, downwards.
The highest point in the living room is the hatch at the top of the stairs, and this is where all the heat from the stove ends up. It made sense to get this area well insulated before winter.


Steve pulled down the tongue and groove panels...


...and the old rockwool...


..and the curved ceiling section that we had put in when we first moved aboard. It had worked well to stop the indoor raining, but wasn't quite keeping all that lovely heat from the stove inside.


I welded yet more brackets in place, and Steve did what he does best. Battens and Celotex.


Hatching a Plan

I've been working very long hours away from the boat for most of the summer, however I did grab a day at home, on a day that wasn't raining during the summer which meant that I could tackle one of our drippy problems.
Whenever it rained, water would drip into the boat up by the entry hatch. (it also dripped through the main skylights but that's for another day).
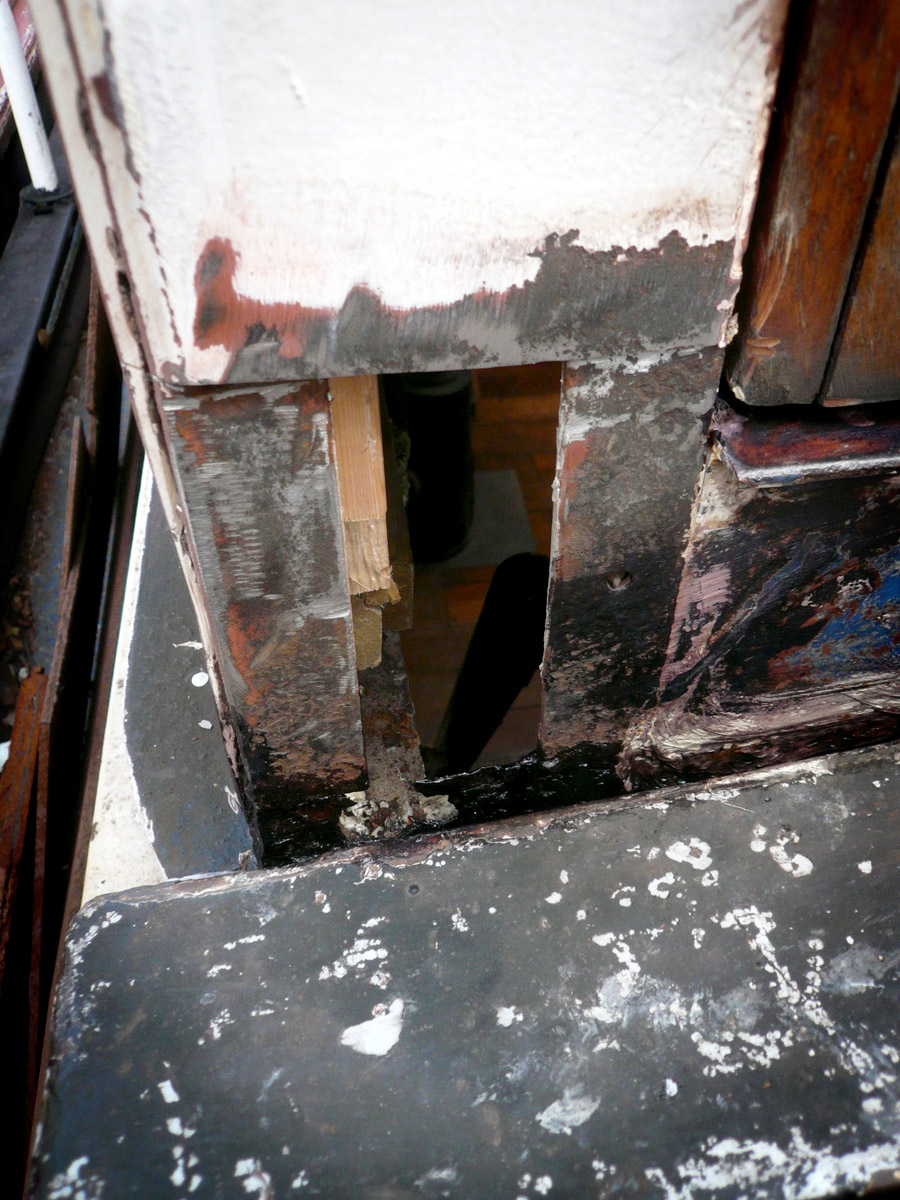
On closer inspection, the issue was where a wooden step section met the metal of the deck locker. I'm sure there must be ways of making wood and metal happy together but when it comes to them being happy AND waterproof it was just easier to scrap the wood bit altogether and replace it with metal.

The original wooden step is painted blue in the picture below.


Steve pulled it out with the help of a crowbar.


You can see the gap we then needed to fill with metal plate.


From one of the pieces of metal that we cut out of the front deck, Steve cut the piece I needed to fill the gap.


Because of the way that the doors sit against the ledge, we decided to add a section of angle iron to the top edge of the metal polygon, so that, should the rain run down the hatch doors and drip off the bottom, it will be collected on the angle 'step' and run outside instead of inside.


I welded the new metal wedge in place, and then welded the angle 'step' on top.


My favourite epoxy filler was used to double the waterproofness, then ground down to a smooth flat, neat finish.


Due to the rubbishness of the old wood/metal combo, we found that a patch of the hatch further down had rotten through. Steve cut the rusty bit out and I welded a new piece of metal into place.


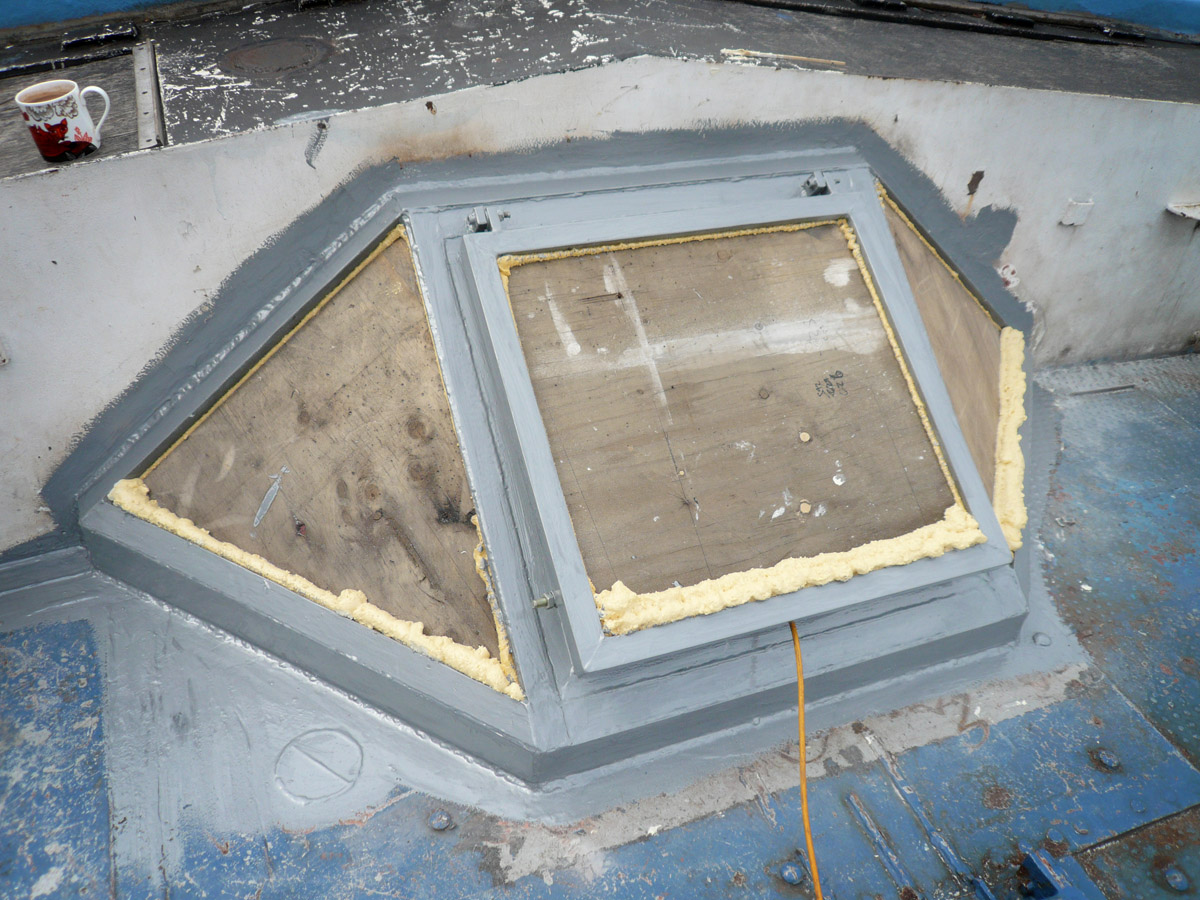
Once this was all painted it looked so much neater than the old wooden contraption.

The Bulk of the insulation.

During the heat of the summer, our minds turned to the large expanses of bare metal in the living room. I welded plenty of brackets to the metal hull and the bulk head between the living room and the engine room. Steve battened them, and insulated them with our favourite Celotex. Whist the Bulkhead wasn't an exterior wall, now that winter has descended upon the Thames, the bulkhead insulation has made a noticable difference.


The Daily Grind

During the summer months, Steve took on the project of grinding all of the paint off the front and back deck so that I could paint it with 2 part deck paint (and the fifty layers of primer that does the Actual protecting of the metal.)

An hour a day didn't feel like much at the beginning, but with each grinding session resulting in 1msq of bare metal, it only took a few weeks to do. The most time consuming patches of deck were those with the nobbly texture.


Sky's the limit.

Hi, it's Lorna updating the blog at long last. Whilst I do not offer nearly as much insight into the process as Steve does it will just have to do.

So the last you heard we had welded in the new skylight on the front deck. I was pretty pleased with my welding by the end, but it's still far from a perfect finish so before painting we smoothed it all out with a layer of epoxy filler so that there would be no crevices for water to pool in once it was painted.

Once it was all in place we could get the glazier to come over and measure up for the double glazing panels for the apertures.